
To run Ubuntu (including Ubuntu 24.04 LTS) in full screen mode on VirtualBox and fix any screen resolution issues, follow the steps below.
Step 1: Ensure Guest Additions Are Installed
Guest Additions are required for full screen and shared clipboard functionality. Open your terminal in the Ubuntu VM and run the following:
sudo apt update
sudo apt install build-essential dkms linux-headers-$(uname -r)
Step 2: Insert Guest Additions CD Image
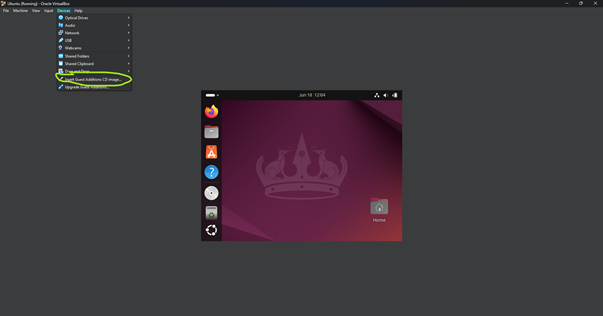
- In the VirtualBox menu bar, go to Devices > Insert Guest Additions CD Image.
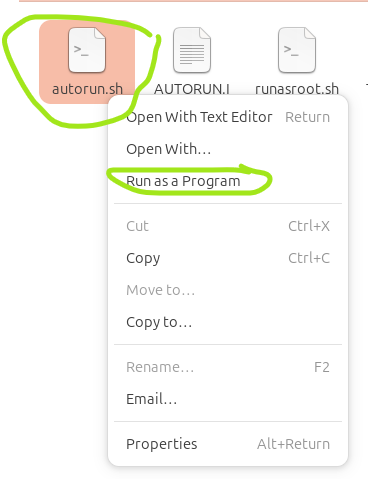
- If prompted to run the software, click Run.
- If not, open the mounted CD and run the following in your terminal:
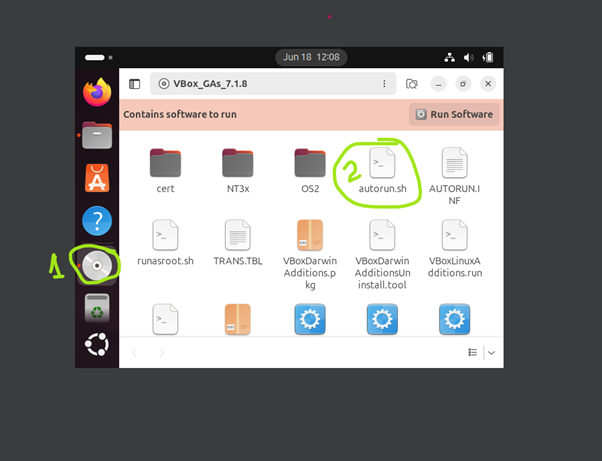
sudo /media/$USER/VBox_GAs_*/VBoxLinuxAdditions.runLet the installation finish - it may take a moment.
Step 3: Reboot the Virtual Machine
Once installation is complete, reboot your VM for the changes to take effect:
sudo rebootStep 4: Enable Full Screen Mode
After reboot:
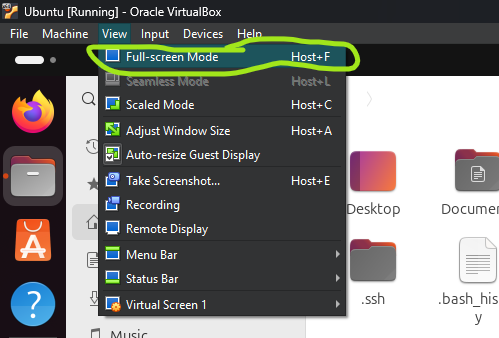
- Go to View > Full-screen Mode in the VirtualBox menu.
- Or simply press Host Key + F (usually the Right Ctrl key).
Ubuntu should now adjust to your actual screen size automatically.
Conclusion
By installing Guest Additions and enabling full screen, Ubuntu on VirtualBox becomes seamless and visually comfortable. You’re now set up for development, testing, or daily use in a full-size, productive environment.